Archive | Daring Bakers Challenges RSS feed for this section

Daring Baker’s Challenge February 2010 – Heaven on a Dessert plate: Tiramisu

27 Feb

This month’s challenge was by Aparna from My Diverse Kitchen and Deeba from Passionate about baking. The challenge was to make Tiramisu from scratch. This means the sponge fingers, the zabaglione, vanilla pastry cream and down to the mascarpone cheese. I was too much of a lazy bum to make the mascarpone cheese from scratch but I made all the other components. Here’s mine.

Before unraveling

After Unraveling and cutting up.

Here’s the recipe:

TIRAMISU

(Recipe source: Carminantonio’s Tiramisu from The Washington Post, July 11 2007 )
This recipe makes 6 servings

Ingredients:
For the zabaglione:
2 large egg yolks
3 tablespoons sugar/50gms
1/4 cup/60ml Marsala wine (or port or coffee)
1/4 teaspoon/ 1.25ml vanilla extract
1/2 teaspoon finely grated lemon zest

For the vanilla pastry cream:
1/4 cup/55gms sugar
1 tablespoon/8gms all purpose flour
1/2 teaspoon finely grated lemon zest
1/2 teaspoon/ 2.5ml vanilla extract
1 large egg yolk
3/4 cup/175ml whole milk

For the whipped cream:
1 cup/235ml chilled heavy cream (we used 25%)
1/4 cup/55gms sugar
1/2 teaspoon/ 2.5ml vanilla extract

To assemble the tiramisu:
2 cups/470ml brewed espresso, warmed
1 teaspoon/5ml rum extract (optional)
1/2 cup/110gms sugar
1/3 cup/75gms mascarpone cheese
36 savoiardi/ ladyfinger biscuits (you may use less)
2 tablespoons/30gms unsweetened cocoa powder

Method:
For the zabaglione:
Heat water in a double boiler. If you don’t have a double boiler, place a pot with about an inch of water in it on the stove. Place a heat-proof bowl in the pot making sure the bottom does not touch the water.
In a large mixing bowl (or stainless steel mixing bowl), mix together the egg yolks, sugar, the Marsala (or espresso/ coffee), vanilla extract and lemon zest. Whisk together until the yolks are fully blended and the mixture looks smooth.
Transfer the mixture to the top of a double boiler or place your bowl over the pan/ pot with simmering water. Cook the egg mixture over low heat, stirring constantly, for about 8 minutes or until it resembles thick custard. It may bubble a bit as it reaches that consistency.
Let cool to room temperature and transfer the zabaglione to a bowl. Cover and refrigerate at least 4 hours or overnight, until thoroughly chilled.

For the pastry cream:
Mix together the sugar, flour, lemon zest and vanilla extract in a medium heavy-bottomed saucepan. To this add the egg yolk and half the milk. Whisk until smooth.
Now place the saucepan over low heat and cook, stirring constantly to prevent the mixture from curdling.
Add the remaining milk a little at a time, still stirring constantly. After about 12 minutes the mixture will be thick, free of lumps and beginning to bubble. (If you have a few lumps, don’t worry. You can push the cream through a fine-mesh strainer.)
Transfer the pastry cream to a bowl and cool to room temperature. Cover with plastic film and refrigerate at least 4 hours or overnight, until thoroughly chilled.

For the whipped cream:
Combine the cream, sugar and vanilla extract in a mixing bowl. Beat with an electric hand mixer or immersion blender until the mixture holds stiff peaks. Set aside.

To assemble the tiramisu:
Have ready a rectangular serving dish (about 8″ by 8″ should do) or one of your choice.
Mix together the warm espresso, rum extract and sugar in a shallow dish, whisking to mix well. Set aside to cool.
In a large bowl, beat the mascarpone cheese with a spoon to break down the lumps and make it smooth. This will make it easier to fold. Add the prepared and chilled zabaglione and pastry cream, blending until just combined. Gently fold in the whipped cream. Set this cream mixture aside.

Now to start assembling the tiramisu.
Workings quickly, dip 12 of the ladyfingers in the sweetened espresso, about 1 second per side. They should be moist but not soggy. Immediately transfer each ladyfinger to the platter, placing them side by side in a single row. You may break a lady finger into two, if necessary, to ensure the base of your dish is completely covered.
Spoon one-third of the cream mixture on top of the ladyfingers, then use a rubber spatula or spreading knife to cover the top evenly, all the way to the edges.
Repeat to create 2 more layers, using 12 ladyfingers and the cream mixture for each layer. Clean any spilled cream mixture; cover carefully with plastic wrap and refrigerate the tiramisu overnight.
To serve, carefully remove the plastic wrap and sprinkle the tiramisu with cocoa powder using a fine-mesh strainer or decorate as you please. Cut into individual portions and serve.

MASCARPONE CHEESE

(Source: Vera’s Recipe for Homemade Mascarpone Cheese)
This recipe makes 12oz/ 340gm of mascarpone cheese

Ingredients:

474ml (approx. 500ml)/ 2 cups whipping (36 %) pasteurized (not ultra-pasteurized), preferably organic cream (between 25% to 36% cream will do)
1 tablespoon fresh lemon juice

Method:

Bring 1 inch of water to a boil in a wide skillet. Reduce the heat to medium-low so the water is barely simmering. Pour the cream into a medium heat-resistant bowl, then place the bowl into the skillet. Heat the cream, stirring often, to 190 F. If you do not have a thermometer, wait until small bubbles keep trying to push up to the surface.
It will take about 15 minutes of delicate heating. Add the lemon juice and continue heating the mixture, stirring gently, until the cream curdles. Do not expect the same action as you see during ricotta cheese making. All that the whipping cream will do is become thicker, like a well-done crème anglaise. It will cover a back of your wooden spoon thickly. You will see just a few clear whey streaks when you stir. Remove the bowl from the water and let cool for about 20 minutes. Meanwhile, line a sieve with four layers of dampened cheesecloth and set it over a bowl. Transfer the mixture into the lined sieve. Do not squeeze the cheese in the cheesecloth or press on its surface (be patient, it will firm up after refrigeration time). Once cooled completely, cover with plastic wrap and refrigerate (in the sieve) overnight or up to 24 hours.
Vera’s notes: The first time I made mascarpone I had all doubts if it’d been cooked enough, because of its custard-like texture. Have no fear, it will firm up beautifully in the fridge, and will yet remain lusciously creamy.
Keep refrigerated and use within 3 to 4 days.

LADYFINGERS/ SAVOIARDI BISCUITS
(Source: Recipe from Cordon Bleu At Home)
This recipe makes approximately 24 big ladyfingers or 45 small (2 1/2″ to 3″ long) ladyfingers.

Ingredients:
3 eggs, separated
6 tablespoons /75gms granulated sugar
3/4 cup/95gms cake flour, sifted (or 3/4 cup all purpose flour + 2 tbsp corn starch)
6 tablespoons /50gms confectioner’s sugar

Method:

Preheat your oven to 350 F (175 C) degrees, then lightly brush 2 baking sheets with oil or softened butter and line with parchment paper.
Beat the egg whites using a hand held electric mixer until stiff peaks form. Gradually add granulate sugar and continue beating until the egg whites become stiff again, glossy and smooth.
In a small bowl, beat the egg yolks lightly with a fork and fold them into the meringue, using a wooden spoon. Sift the flour over this mixture and fold gently until just mixed. It is important to fold very gently and not overdo the folding. Otherwise the batter would deflate and lose volume resulting in ladyfingers which are flat and not spongy.
Fit a pastry bag with a plain tip (or just snip the end off; you could also use a Ziploc bag) and fill with the batter. Pipe the batter into 5″ long and 3/4″ wide strips leaving about 1″ space in between the strips.
Sprinkle half the confectioner’s sugar over the ladyfingers and wait for 5 minutes. The sugar will pearl or look wet and glisten. Now sprinkle the remaining sugar. This helps to give the ladyfingers their characteristic crispness.
Hold the parchment paper in place with your thumb and lift one side of the baking sheet and gently tap it on the work surface to remove excess sprinkled sugar.
Bake the ladyfingers for 10 minutes, then rotate the sheets and bake for another 5 minutes or so until the puff up, turn lightly golden brown and are still soft.
Allow them to cool slightly on the sheets for about 5 minutes and then remove the ladyfingers from the baking sheet with a metal spatula while still hot, and cool on a rack.
Store them in an airtight container till required. They should keep for 2 to 3 weeks.

Daring Baker’s Challenge December 2009 – Gingerbread House

24 Dec

The happiest time of the year is here again – you may say its cliché… But I think it’s mostly true. The people I have interacted with in the last week have been bouncier, lovelier and friendlier than they’ve been all year. There’s like this happy vibe spreading through the universe (well most of it anyway) at the moment.

The last week has been a pretty big week in terms of celebrations – too much food and too much drink – the mouth says “Yes Please!!” but the tummy says “STOP Please!!” The Christmas party we had for work was an example of indulging in excess. Though some of us would like to forget that that day ever happened, or even better still, pretend that we were ever at that party at all (you know who you are), these are the memories that remind us that there is still a little bit of fun and cheek in all of us.

In many ways, my Christmases have evolved a great deal in the last 5 years – However, I have enjoyed the festivities nevertheless. I look back on the past decade (GAWD I’m feeling old!) and am amazed how my life has changed in so many ways. I wonder what the next 5 years will bring.

This month’s Daring Baker’s Challenge was to make a Gingerbread house. It took me 3 evenings to complete (though I would’ve finished alot quicker if my lolly supply wasn’t continuously hijacked!!) but I enjoyed making the house immensely. It’s entitled -“The Gnomes Christmas.” Merry Christmas flog readers!!

Picture 1: The Gnomes gingerbread house

Picture 2: Gingerbread house from the side (with stained glass windows and edible plants)

Picture 3: Close up – Gus riding his tractor

Picture 4: Close up – Marko and Licorice, the Googly eyed cat

Picture 4: Close up – Licorice, the Googly eyed cat

Petit Fours & a Passionfruit Gateux

28 Oct

I have been so tired this week that the thought of skipping a couple of prac. classes to catch up on some sleep was as tempting as dangling an apple in front of a hungry possum (Do possums eat apples? ….I don’t really know to be honest…) In the absence of sleep, I have been compensating by topping up on caffeine and constant doses of anything that is high in sugar.

On Monday, they were giving out free Ben and Jerry’s ice-cream in the front lawn at my workplace. Hordes flocked to the ice-cream van like vultures. V and I were too late and when we got to the van, there was nothing left. Not even a whiff… We were even scorned by the pimply pubescent lad that was giving out the freebies when we asked if there was anymore free ice-cream. “Nah…” he said. Then he pointed to an overturned icecream cup on the ground and said “There’s some there if you’re desperate.”

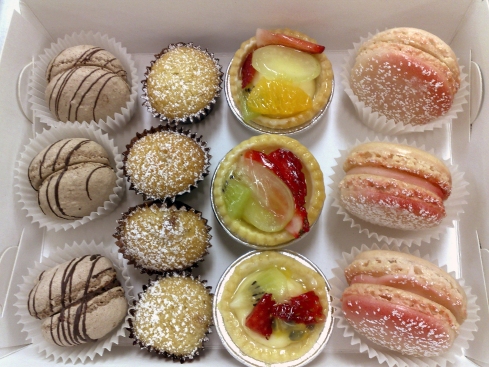
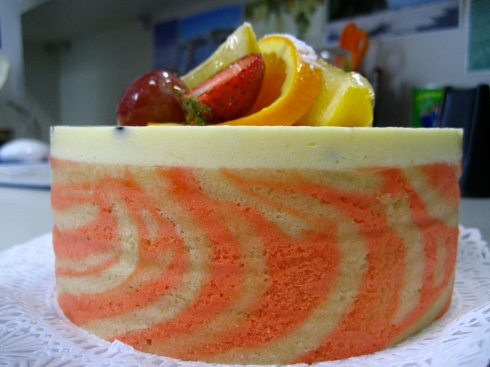
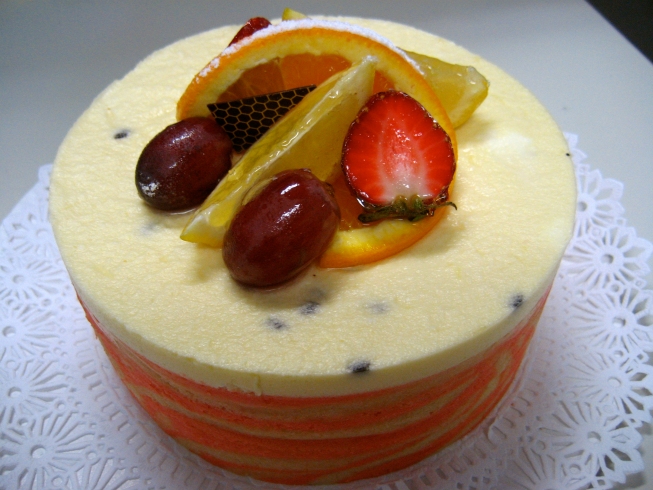
So… no free ice-cream for the sleep deprived… but I’m glad I didn’t miss prac. classes this week. We made loads of yummy things. Petit Fours – which consisted of macaroons!! And a beautiful passionfruit gateux.

P/S: I actually learnt more from the Daring Baker’s Challenge on macaroons than I did from school. It was clear that even the teacher was apprehensive about making macaroons. (No advise was given on mixing techniques and he avoided speaking about macaroons altogether. We had to just follow the recipe given to us.) So… once again… 3 cheers for the Daring Baker’s Challenges.

petitfours2

passion1

passion2

Daring Baker’s Challenge October 2009 – Macaroons

27 Oct

The month of October was my very first Daring Baker’s Challenge and I cannot begin to tell you how excited I was to be a part of this for the very first time.

Because I live in the Southern hemisphere, it took me a day to realise that I wasn’t going to find out what the challenge was till the second day of October. Anyway, to cut the long story short… I did eventually find out. It was macaroons. I was apprehensive, firstly, because I had never made macaroons before and secondly, macaroons have a reputation of going terribly wrong – and so they did….

I knew I was going to be learning lots from this challenge

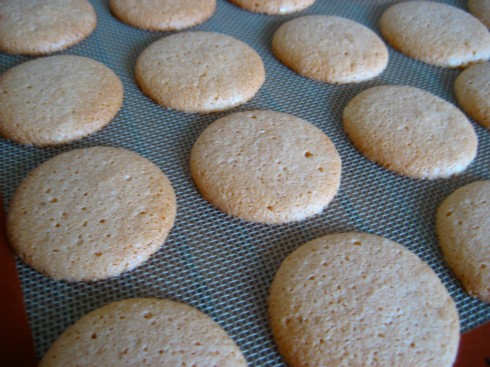
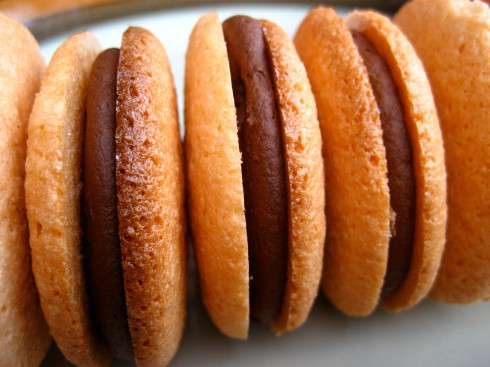
My first attempt was a failed attempt – as you can see from the pictures below. Firstly… they didn’t have feet!! ARK!!! And secondly, they were holey and slightly airy in texture.

IMG_7201

Above is a picture of them before they went into the oven. (After reading some advise from audex and mytartelette, I learnt that this “nipple” shaped macaroon is not the correct shape of an unbaked macaroon at all. This meant the texture of the mixture is wrong due to incorrect mixing techniques and therefore, producing macaroons that look like this – see below. SOB! I was devastated. They look like butter cookies instead of macaroons.)

IMG_7207

I proceeded to fill the failed macaroons with dark chocolate and orange ganache anyway. They tasted pretty good but they really didn’t look like what a macaroon should.

IMG_7213

I was determined to try AGAIN! Afterall, I had to now live up to being a “Daring” Baker!!

My second attempt –

IMG_7260

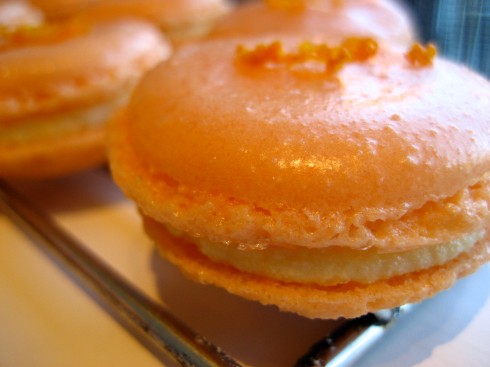
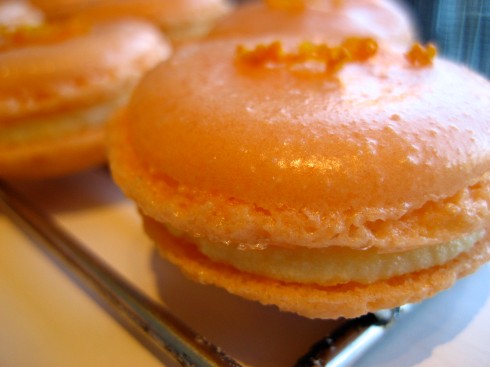
I hear angels burst into song and see confetti pouring down from the ceiling as I opened the oven door. The macaroons were shiny and they had feet! They weren’t perfect but I was happy. I sandwiched them with white chocolate and orange ganache this time round.

IMG_7253

IMG_7254

IMG_7260

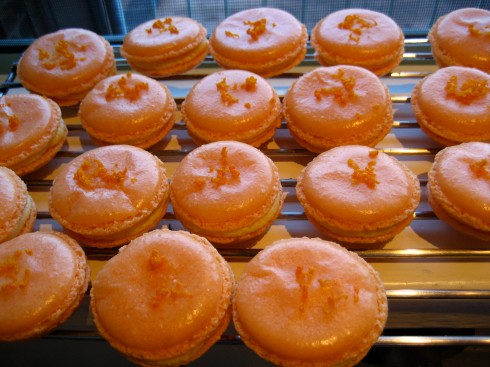
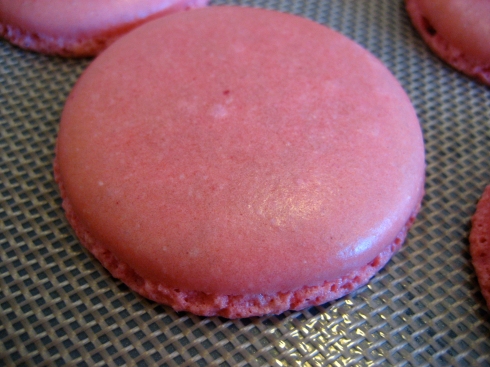
My final attempt (after maybe about 7 other attempts over the past month) was to ensure that I could perfect the macaroon. I really really wanted to get it right. I eventually figured out that my oven was too hot and it was cooking the crust but not the inside of the macaroon, therefore giving it a wrinkly top. I turn the oven down to 135 °C and bake them in the oven for 20 – 25 mins and they turned out looking like these…..

PINK

PINK1

IMG_7233

Despite having eaten unsuccessful macaroons to death (to the extent that the roof of my mouth was chapped and sore), I think I nailed it. I have learnt so much. Thanks for the challenge.

Here’s the recipe from Ami S :

Ingredients for the macaroons:

  • Confectioners’ (Icing) sugar: 2 ¼ cups (225 g, 8 oz.)
  • Almond flour: 2 cups (190 g, 6.7 oz.)
  • Granulated sugar: 2 tablespoons (25 g , .88 oz.)
  • Egg whites: 5 (Have at room temperature)

Method:

1. Preheat the oven to 200°F (93°C). Combine the confectioners’ sugar and almond flour in a medium bowl. If grinding your own nuts, combine nuts and a cup of confectioners’ sugar in the bowl of a food processor and grind until nuts are very fine and powdery.
2. Beat the egg whites in the clean dry bowl of a stand mixer until they hold soft peaks. Slowly add the granulated sugar and beat until the mixture holds stiff peaks.
3. Sift a third of the almond flour mixture into the meringue and fold gently to combine. If you are planning on adding zest or other flavorings to the batter, now is the time. Sift in the remaining almond flour in two batches. Be gentle! Don’t overfold, but fully incorporate your ingredients.
4. Spoon the mixture into a pastry bag fitted with a plain half-inch tip (Ateco #806). You can also use a Ziploc bag with a corner cut off. It’s easiest to fill your bag if you stand it up in a tall glass and fold the top down before spooning in the batter.
5. Pipe one-inch-sized (2.5 cm) mounds of batter onto baking sheets lined with nonstick liners (or parchment paper).
6. Bake the macaroon for 5 minutes. Remove the pan from the oven and raise the temperature to 375°F (190°C). Once the oven is up to temperature, put the pans back in the oven and bake for an additional 7 to 8 minutes, or lightly colored.
7. Cool on a rack before filling.

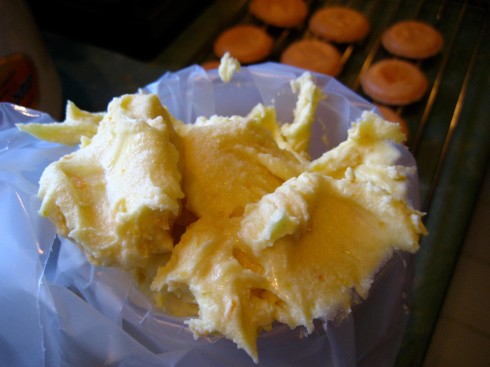
Ingredients for the White chocolate and orange ganache:

  • 225 grams white chocolate (chopped into small pieces)
  • 150 ml cream
  • 20 grams glucose
  • zest of 1 orange
  • splash of orange essense

Method:

  1. Place the cream and glucose in a saucepan and bring to a gentle boil.
  2. Remove the saucepan from the heat and add the white chocolate to the cream mixture.
  3. Stir till the chocolate is melted.
  4. Add the orange zest and orange essence and stir till mixture in.
  5. Place the saucepan in a bowl of ice water and stir the ganache till you get a pipeable consistency.

Assembly:

Pipe the ganache onto one macaroon and sandwich it between another.

NOTE: There were somethings that I did differently from the above recipe the second time round which made the macaroons work.

  1. I added all the almond meal and icing sugar to the egg whites all at once and for the first 12 strokes, I mixed in fast, breaking some air bubbles out from the whites.
  2. I also did not fold the mixture for more than 50 strokes in total – ok… maybe I folded 60 strokes.
  3. After piping on the silicon mat, I banged the mat on the table surface to get rid of excess air bubbles and I allowed the mixture to sit on the bench for about 30 minutes for them to form a skin before putting them in for the first bake.

These were advise which I found from Helen of Tartelette’s blog. She’s amazing…